Installing TrueNAS
Installing TrueNAS
Lots of writing :(
Networking
Assuming you have created the inter-VM bridge network vmbr1, we can now connect it to TrueNAS.
Connect TrueNAS to the newly created bridge
This step requires that you have installed TrueNAS Scale in a VM.
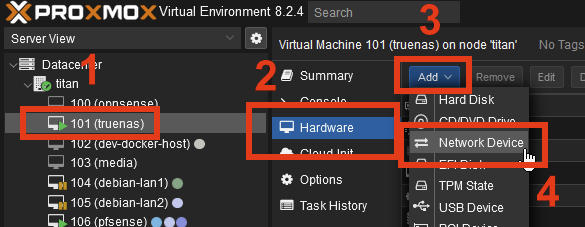
- Select your TrueNAS VM
- Go to Hardware
- Click Add
- Select Network Device:
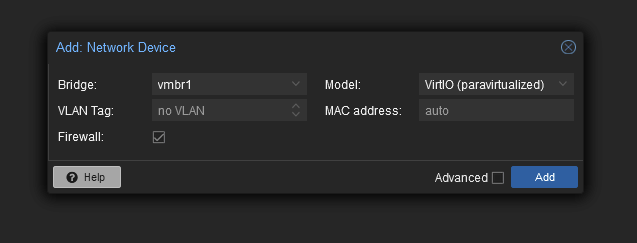
- Select the newly created
vmbr1and click Add:


Viewing TrueNAS network configuration
- Open the TrueNAS web UI using whatever IP address TrueNAS is reachable at.
- Navigate to Networking. It should look roughly like this:

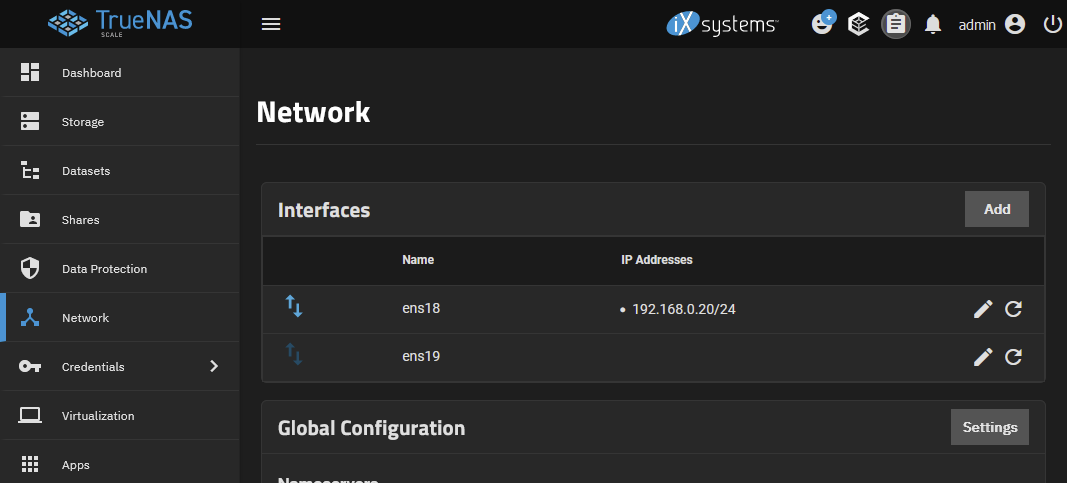
Primarily, you will now see two interfaces. Most likely, only one of them will have an IP address assigned already. This is the WAN, or the "where TrueNAS gets internet" interface.
The second interface however will probably not have any IP address. This is the vmbr1 inter-VM bridge network we created.
Configuring the bridge interface
Make absolutely sure you do not modify the primary network interface, as doing so may make the machine unreachable via network.
Configure the inter-VM bridge to not use DHCP, and instead manually assign the IP 192.168.255.20:
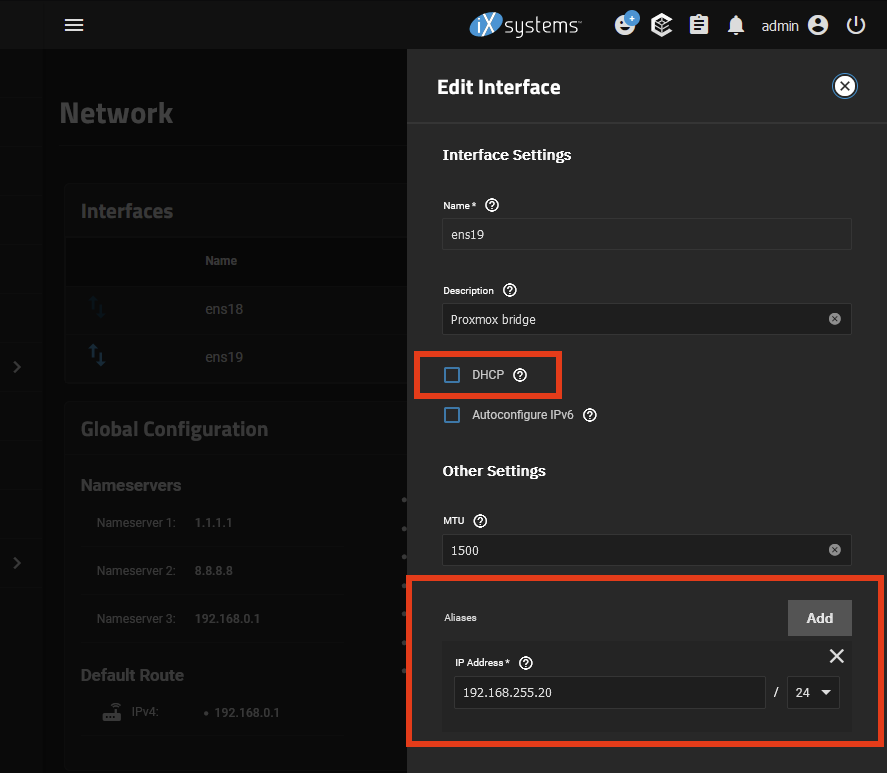
Save the settings, click [Test Configuration] and then [Save Configuration].
Summary
- We installed TrueNAS Scale in a VM;
- We connected TrueNAS to our dedicated network bridge
vmbr1that will let Proxmox access TrueNAS directly.
Good work!