Preparing Proxmox for running TrueNAS
There is various versions of network configuration on this page:
Default networking (unsafe);TrueNAS-ready networking (during bootstrapping or disaster recovery);Routed networking (safe).
Default networking (unsafe)
TrueNAS should not (and largely cannot) run in this configuration.
By default, Proxmox creates the vmbr0 bridge to connect Proxmox itself to the internet.
If the machine is physically the first device connected to the internet, you should move on to the more advanced networking steps as soon as possible.
In this scenario, the network setup is as follows:
The bridgevmbr0exists by default:It's used to connect both Proxmox itselfandall VMs to the internet.
Continue to the next section.
TrueNAS-ready networking
This is required for running TrueNAS.
Prerequisites
Your setup before is expected to be:
- The machine is physically connected to some form of upstream internet;
- The only network bridge that currently exists is the default
vmbr0.
Steps
Creating the inter-VM network bridge
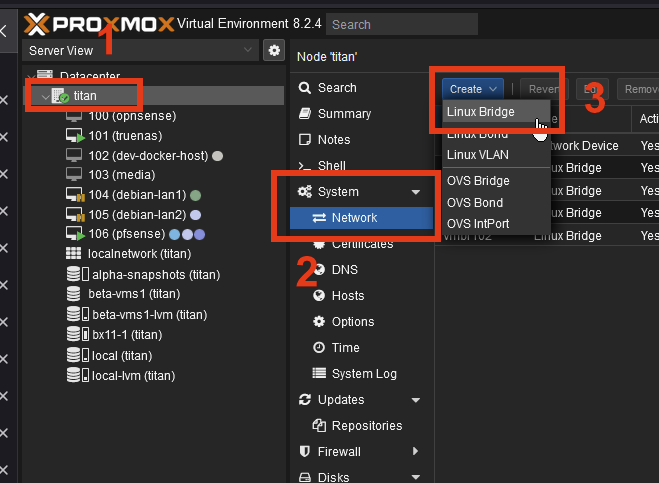
To allow virtual machines to communicate safely, we will be creating a new bridge vmbr1. VMs that require direct communication with each other with no additional routing in between them will use this bridge to talk to each other.
- Select your Proxmox node.
- Go to System > Network
- Click Create > Linux Bridge:

- A popup should appear. Fill it out like so:

The IPv4 we set here is the address at which the Proxmox node itself will be reachable on this bridge. If left empty, it will not be reachable by VMs. ClickClick Create.-
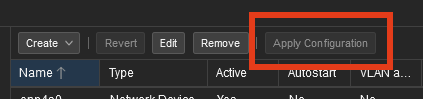
Apply the changes:
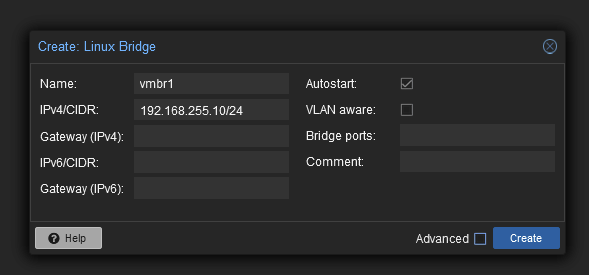

The inter-VM network bridge is now created, and Proxmox itself is reachable on the bridge via the address 192.168.255.10.
Install
TrueNAS in a VM
Please follow the steps in the TrueNAS chapter and come back once finished.
Connect TrueNAS to the newly created bridge
This step requires that you have installed TrueNAS Scale in a VM.
Select your TrueNAS VMGo to HardwareClickAddSelectNetwork Device: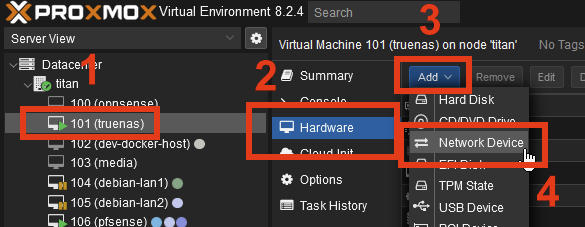
Select the newly createdvmbr1and clickAdd: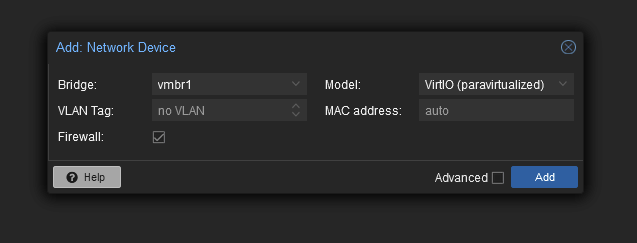


Summary
Routed networking (safe)
You mustare havenow completed all previous steps.
TrueNAS is requiredready to performinstall these steps.TrueNAS.