Network storage
Details about and a guide for connecting to my Network-Attached Storage (NAS).
Connecting to my network
Connecting via Tailscale
Many services I run require a safe and secure connection between you and the server running the service. To facilitate this, I use a piece of software called Tailscale.
It allows our devices to connect via the the internet, even if we are physically far apart, and even if services are running inside an isolated machine on my or your home network.
Check if you have Tailscale
If your device is running Windows, you can check your taskbar tray to see if Tailscale is already running.
1. Tailscale is disconnected

Do you see the above icon in your taskbar? Then continue to Log in to Tailscale.
2. Tailscale is connected

If you see the above icon, continue to Conclusion.
3. I don't see either icon
Continue reading for instructions on how to install Tailscale.
Installing Tailscale
If you do not already have Tailscale installed, head over to the Tailscale download page and follow the instructions: https://tailscale.com/download
Starting Tailscale
You do not need an account. You will be connecting to my tailnet using an authentication key.
1. Get an authentication key
A Tailscale authentication key looks like this:
tskey-auth-k5MukmtKx621CNTRL-Te6eVCugAb9gdj27hJqYY9RNRdRcQcN1If I have not already provided you with an authentication key, contact me.
2. Open a command prompt or terminal
Open the Windows search menu and type in: cmd
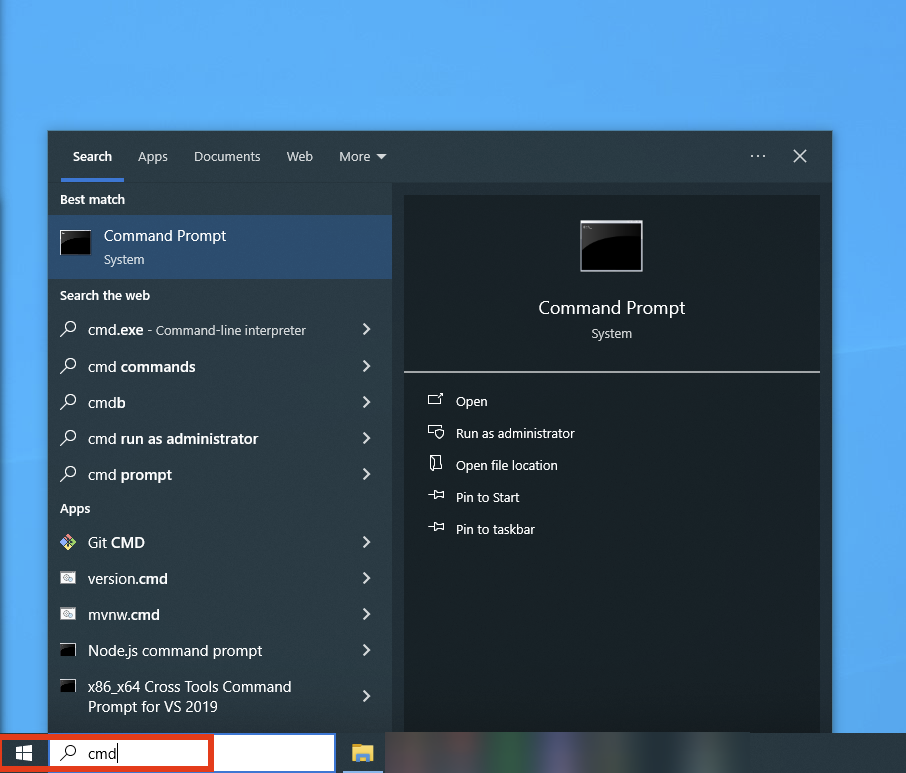
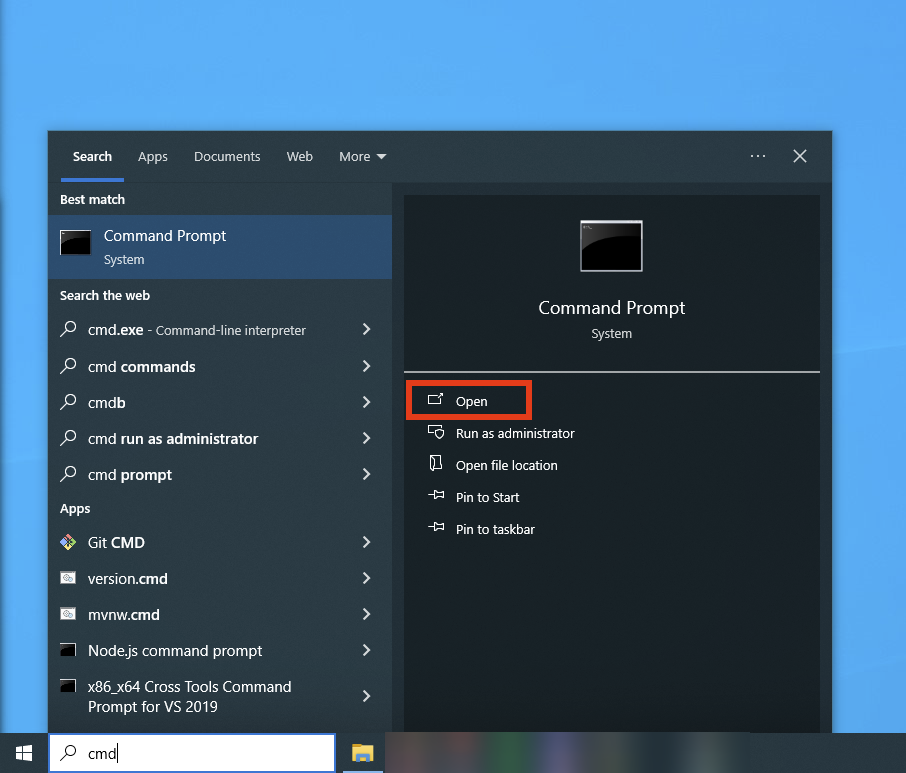
Then, click Open:
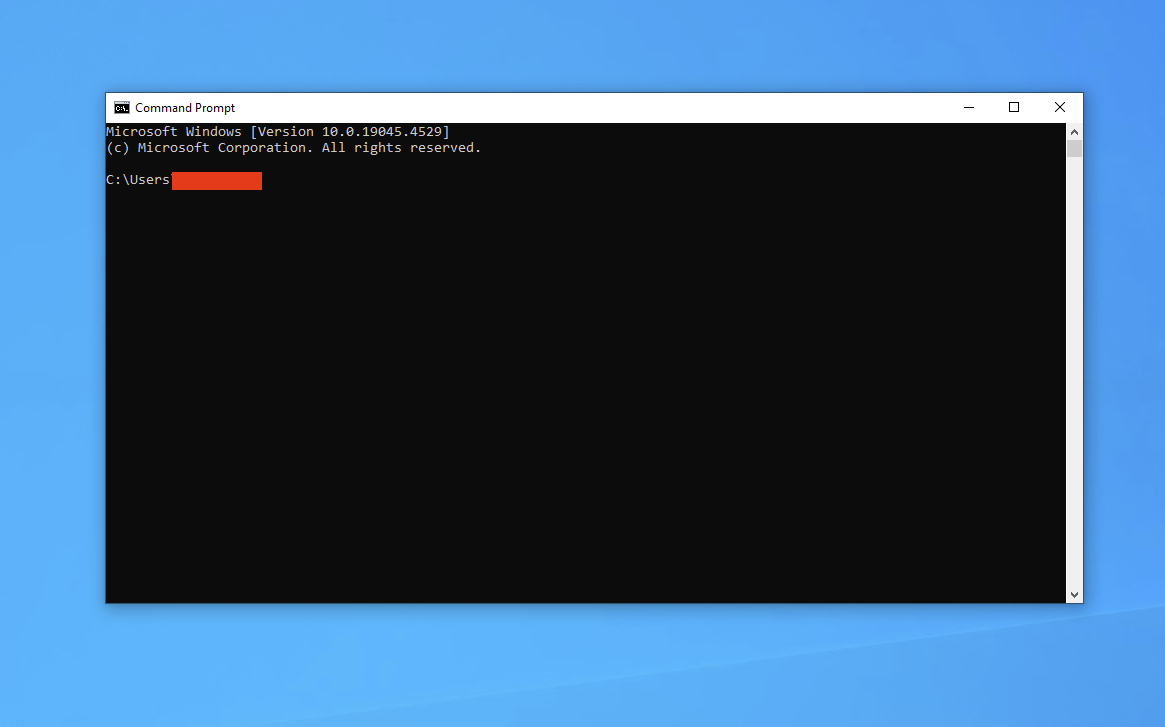
You should now see a window that looks like this (minus the red bar):
3. Login and launch Tailscale
Now that you have the command prompt open, type the following:
tailscale up --auth-key PUTTHEKEYHERETip: You can right-click the window to paste from your clipboard. Use this to paste the authentication key.
To illustrate, an example using the authentication key from earlier:
tailscale up --auth-key tskey-auth-k5MukmtKx621CNTRL-Te6eVCugAb9gdj27hJqYY9RNRdRcQcN1If all goes well, you should see basically no output:
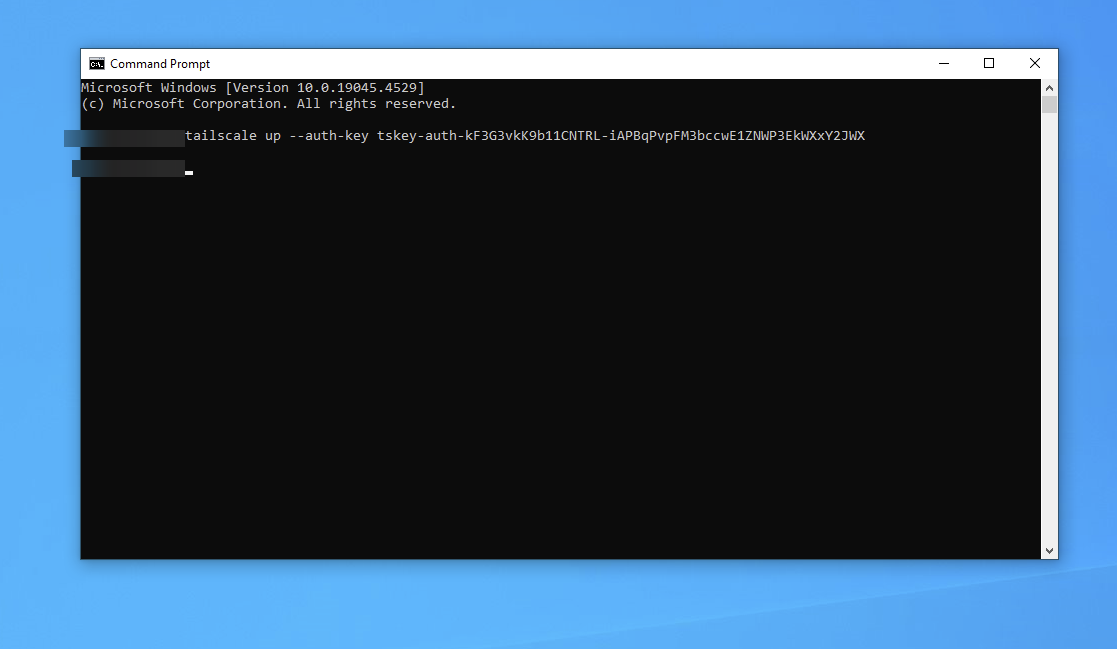
You can check if it worked by typing tailscale status. If you see a list of IP addresses and device names, you are connected!
Conclusion
Good work! You are now connected to my Tailnet. This will allow you to access all services I've given you access to.
You can continue to the next guide: Add a network drive
Connecting via WireGuard
Introduction
WireGuard is a tunneling protocol that lets you establish a secure connection, either directly to another host, or to another network or subsection thereof. This can be utilized as a VPN or as a secure entry into another network for accessing storage or other services.
This article is a short walk-through of deploying a wireguard configuration you get from me to access one or more services in my homelab.
Prerequisites
- A WireGuard config file, archive with password;
- The password for the archive;
- A Linux machine.
If you do not have such a WireGuard config archive or the password, contact me.
Installing dependencies
Since WireGuard comes with the kernel, we will only need to install some utilities.
On Debian
sudo apt install wireguard-tools p7zipOn Arch Linux
sudo pacman -S wireguard-tools 7zipUnpacking the config
This requires a password. You either have received the password already, or will receive it from me via a channel separate to the one I used to give you the archive.
This requires 7z installed:
7z x wg.7zYou should see a file akin to WG-<numbers>-<description>-<name>.conf.
Move the file to your WireGuard directory:
sudo mv WG-98-NAS-Example.conf /etc/wireguard/wg1.confYou can choose any name for the destination file; just make sure it's a legal network interface name.
The below file name would result in a network interface called wg1.
Connecting
Assuming you named the file wg1.conf:
wg-quick up wg1And you're done!
Continue reading:
Mounting storage
Guides on mounting a network share on your local machine.
Mount a network drive (Windows)
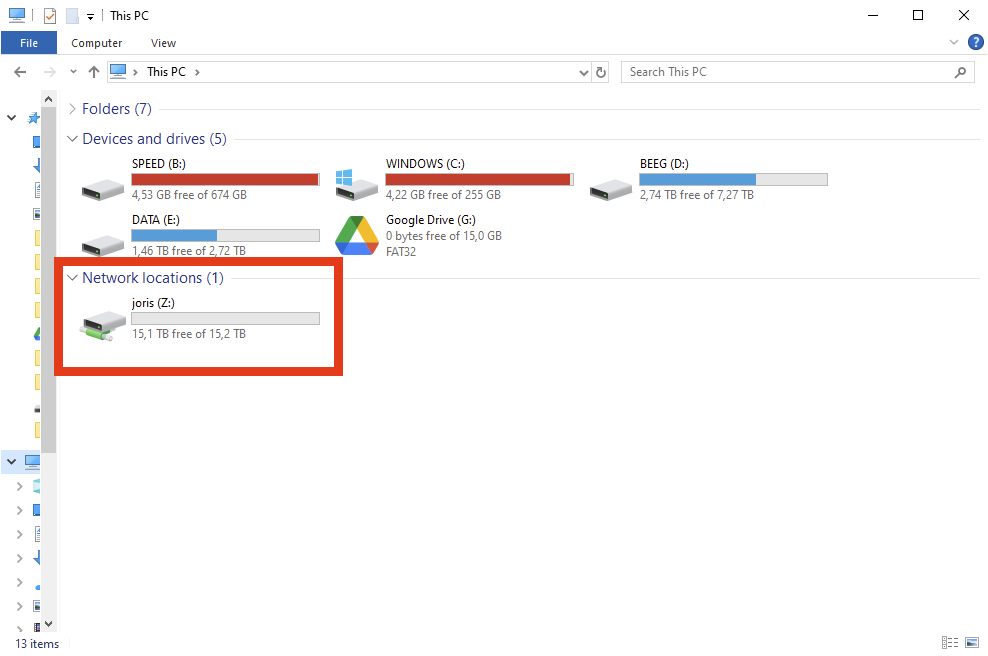
In this guide, we will walk through adding a network drive in Windows.
That means going from this:
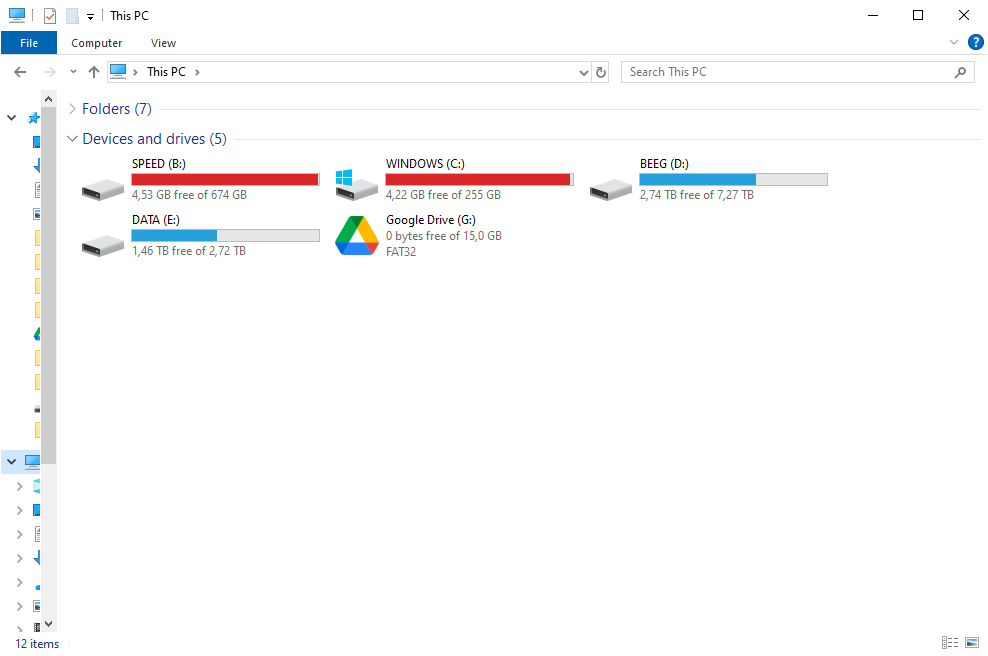
To this:
Prerequisites
- You have connected to Tailscale.
- You have received the following things from me:
- The name of the network share created for you;
- The username and password you need to authenticate with.
- If any of these were not provided to you, please contact me.
Before we begin..
I SHALL NOT BE LIABLE FOR ANY DAMAGES OR LOSSES ARISING FROM ANY USE OF THE NETWORK SHARE, INCLUDING ANY INTERRUPTIONS TO THE NETWORK SHARE, INCLUDING, BUT NOT LIMITED TO, ANY POWER OUTAGES, SYSTEM FAILURES, NETWORK ATTACKS, SCHEDULED OR UNSCHEDULED MAINTENANCE, OR OTHER INTERRUPTIONS.
YOU are responsible for keeping enough backups of your data.
Recommended reading: https://www.backblaze.com/blog/the-3-2-1-backup-strategy/
With that out of the way, let's begin!
Instructions
First, open Windows Explorer, and navigate to This PC:
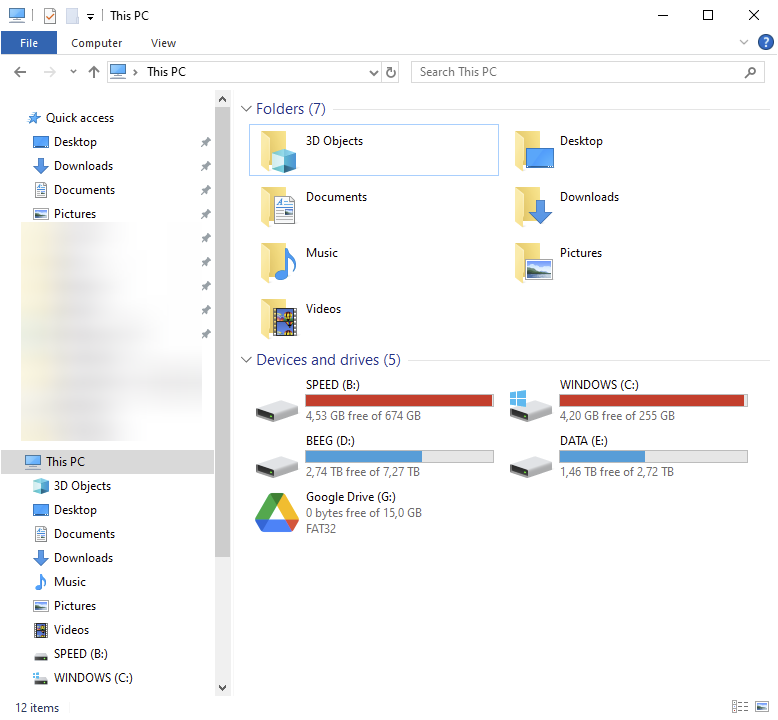
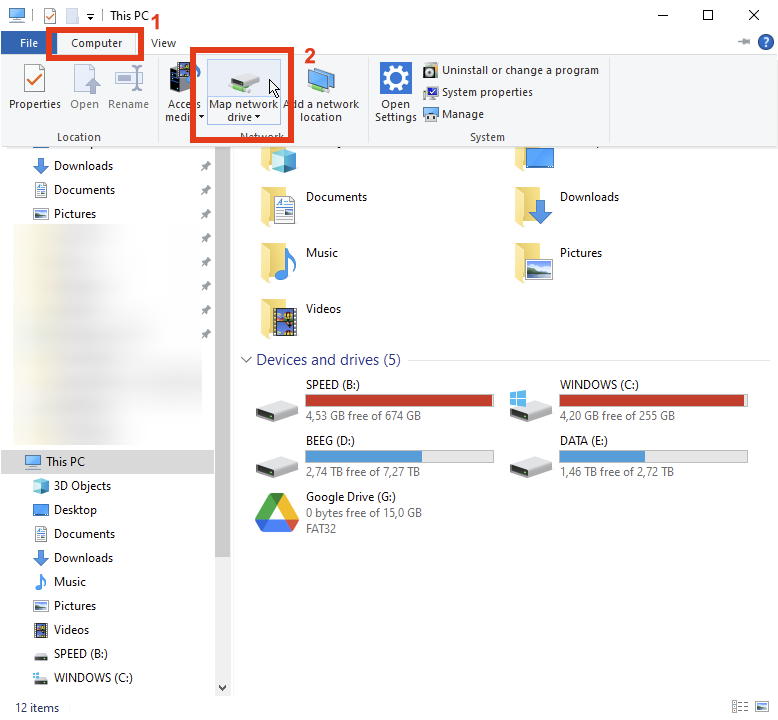
You should be greeted by a window that looks something like this:
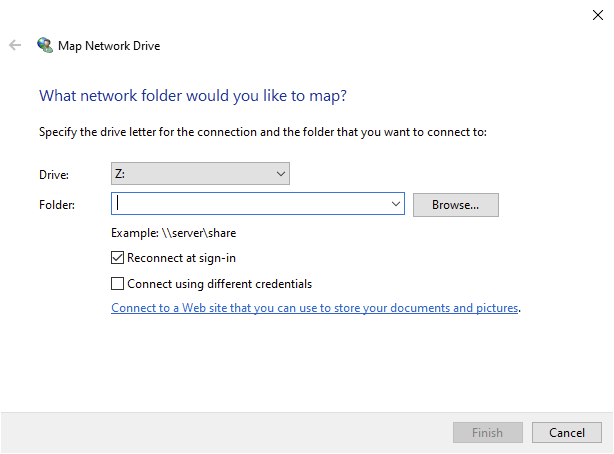
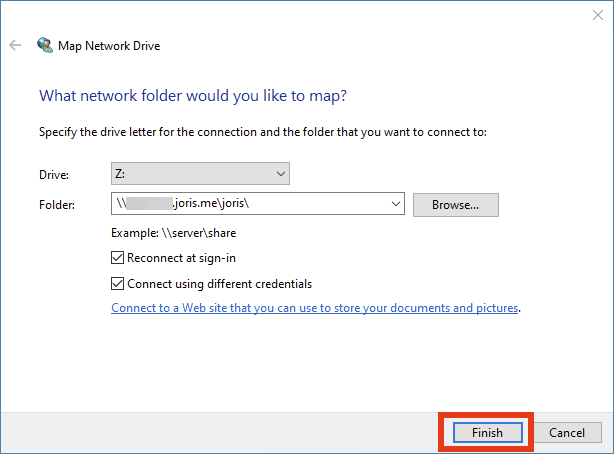
If you want, choose a drive letter of your choice:
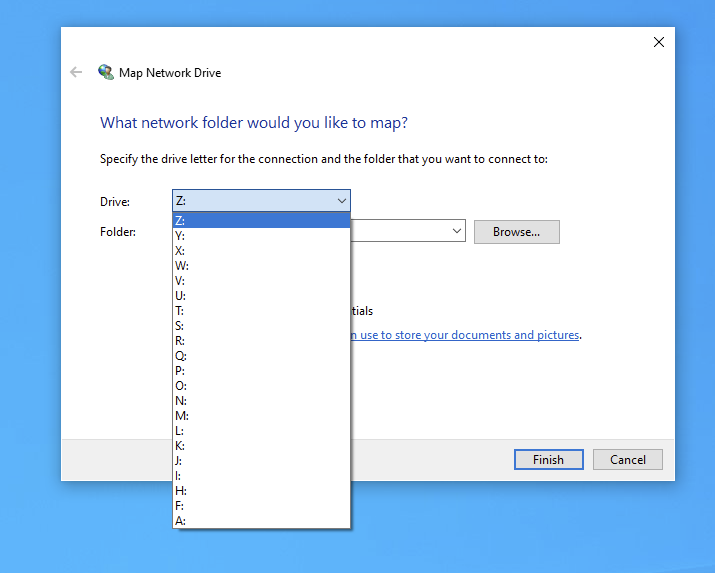
Then, for Folder, enter the following:
\\smb.ts.joris.me\yourShareNameHere\For example, my share is called joris, so for me it looks like this:
\\smb.ts.joris.me\joris\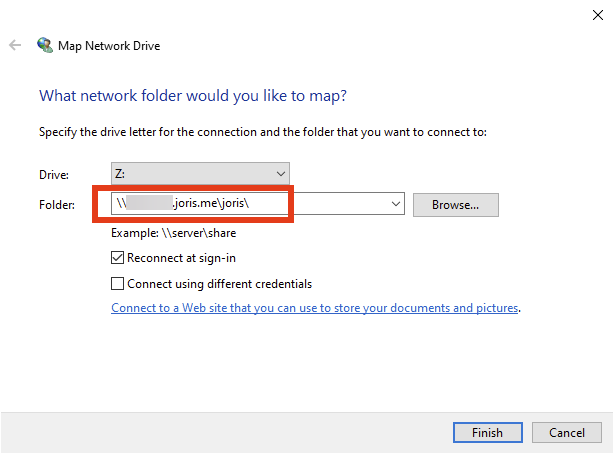
Then, check the box that says "Connect using different credentials".
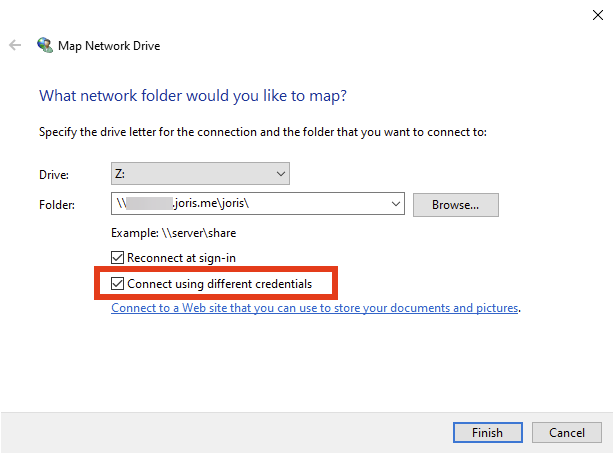
Next, click Finish.
You will see a window that looks like this:
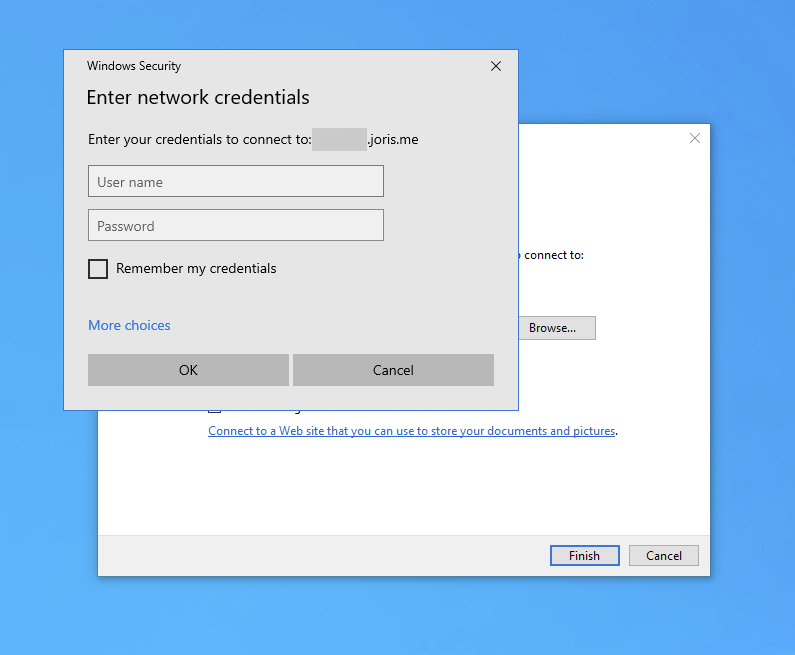
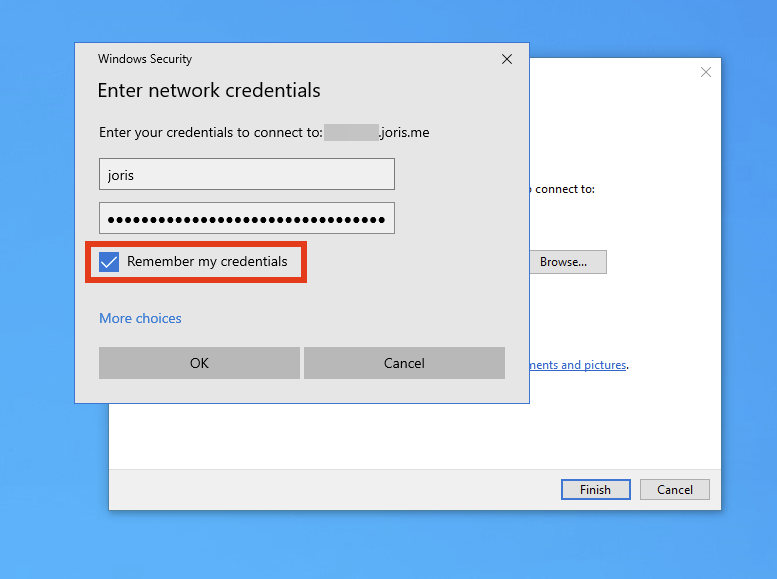
Enter the credentials I provided you, and check "Remember my credentials":
Then click OK:
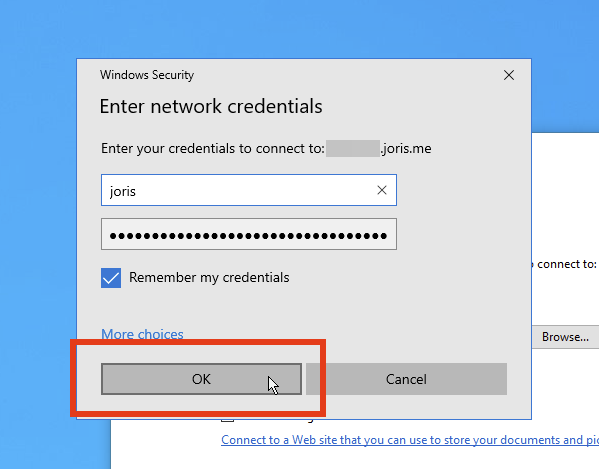
And you're done!
You will probably be greeted by the drive:
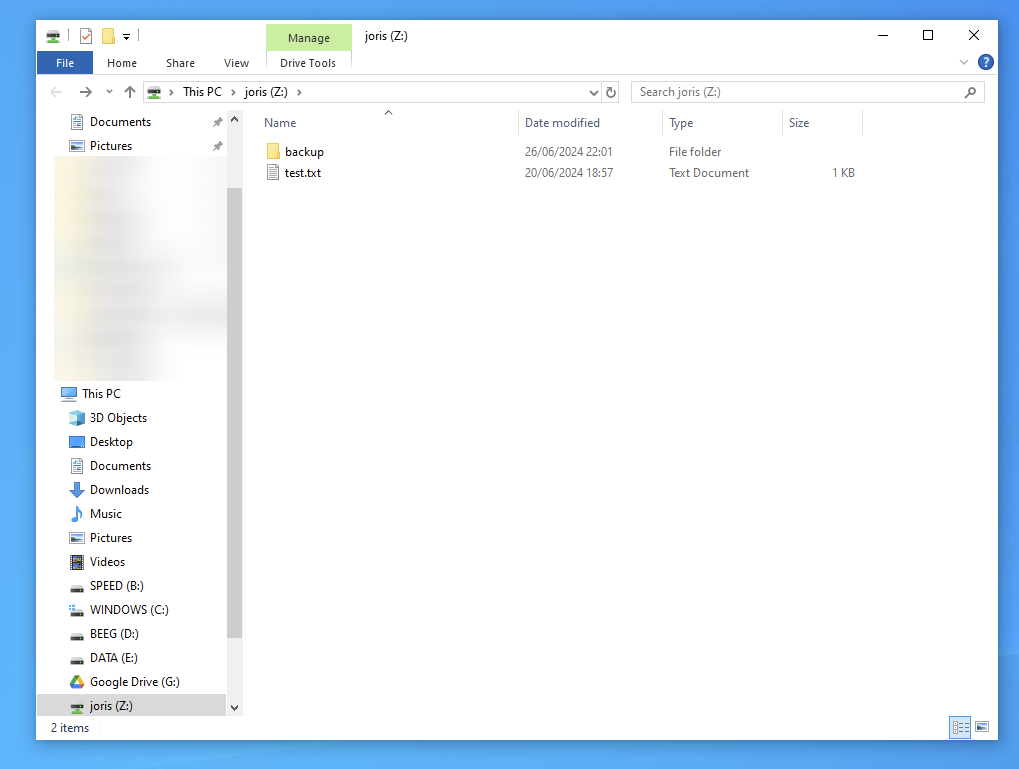
In your case, there won't be any existing files.
Mount a network drive (Linux NFS)
Introduction
This is a short manual on mounting network storage on Linux using NFS.
This guide assumed that you have established a connection to my network; see Connecting to my network if you haven't already.
Before we begin..
I SHALL NOT BE LIABLE FOR ANY DAMAGES OR LOSSES ARISING FROM ANY USE OF THE NETWORK SHARE, INCLUDING ANY INTERRUPTIONS TO THE NETWORK SHARE, INCLUDING, BUT NOT LIMITED TO, ANY POWER OUTAGES, SYSTEM FAILURES, NETWORK ATTACKS, SCHEDULED OR UNSCHEDULED MAINTENANCE, OR OTHER INTERRUPTIONS.
YOU are responsible for keeping enough backups of your data.
Recommended reading: https://www.backblaze.com/blog/the-3-2-1-backup-strategy/
With that out of the way, let's begin!
Installing dependencies
We need NFS client tools to mount a drive.
On Debian
sudo apt install nfs-commonOn Arch Linux
sudo pacman -S nfs-utilsMount a volume
I have a separate domain used for resolving machines and services on my homelab.
Take the following script and fill it out with your parameters.
#!/bin/bash

POOL=alpha # Leave as-is unless told otherwise.
SHARE=joris # <-- Put your name here, in lower case.
MOUNT=/mnt # <-- Write where you want to mount it.

sudo mount truenas.storage.jorislab.nl:/mnt/$POOL/$SHARE $MOUNT
And we're done! Enjoy!
Accessing storage directly
Guides on using Rclone to access storage directly, no mounting involved.
Accessing a share (rclone + SMB)
Introduction
This guide teaches you how to access a network share using rclone via the SMB protocol.
This guide assumed that you have established a connection to my network; see Connecting to my network if you haven't already.
Before we begin..
I SHALL NOT BE LIABLE FOR ANY DAMAGES OR LOSSES ARISING FROM ANY USE OF THE NETWORK SHARE, INCLUDING ANY INTERRUPTIONS TO THE NETWORK SHARE, INCLUDING, BUT NOT LIMITED TO, ANY POWER OUTAGES, SYSTEM FAILURES, NETWORK ATTACKS, SCHEDULED OR UNSCHEDULED MAINTENANCE, OR OTHER INTERRUPTIONS.
YOU are responsible for keeping enough backups of your data.
Recommended reading: https://www.backblaze.com/blog/the-3-2-1-backup-strategy/
With that out of the way, let's begin!
Prerequisites
- A Linux machine;
- A working WireGuard or Tailscale connection to my homelab;
- The following three strings:
Installing dependencies
We only really need to install rclone.
On Debian
sudo apt install rcloneOn Arch Linux
sudo pacman -S rcloneAdding the remote
$> rclone config
Current remotes:

Name                 Type
====                 ====
unrelated1           http
unrelated2           smb

# ..bla bla..
e/n/d/r/c/s/q> n

# Choose a name for your remote:
name> example_smb

# A very long list appears, you can ignore it.
# Just write:
Storage> smb

# Enter this host exactly:
Option host.
host> truenas.storage.jorislab.nl

# Enter your first name, in lower case. For example:
Option user.
user> joris

# Port number: default
port> # press Enter

# Use a password? Yes.
Option pass.
y/g/n> y

Enter the password:
password: # Paste the password you were given.
Confirm the password:
password: # Paste it again.

# No specific domain
domain> # press Enter

Edit advanced config?
y/n> n # No

# Save the remote.
Keep this "example" remote?
y/e/d> y # yes

# You should now land back at the start.
# Write 'q' to exit
e/n/d/r/c/s/q> q
Testing the remote
After exiting the interactive CLI, you should now be able to run:
# Format: <remote>:<path>
$> rclone ls example_smb:/example/
It might seem odd to write 'example' as path here. The format is <remote>:<path>. However, SMB is a directory, even at the very top level: the root directory is just a list of shares. Because of this you first have to write your share name as the first 'folder' in the path. Folders and files below that are yours.
To test reading and writing:
# Create a file:
$> echo hello > hello.txt

# Copy the file to the remote:
$> rclone copy hello.txt example_smb:/example/

# List files in the remote:
$> rclone ls example_smb:/example/
        6 hello.txt
Wrapping up
I suggest heading over to the rclone docs to find how you want to utilize rclone effectively. The two most common use-cases I've found are rclone copy and rclone sync; the only difference being that the latter also deletes files.
And we're done! Enjoy!