I SHALL NOT BE LIABLE FOR ANY DAMAGES OR LOSSES ARISING FROM ANY USE OF THE NETWORK SHARE, INCLUDING ANY INTERRUPTIONS TO THE NETWORK SHARE, INCLUDING, BUT NOT LIMITED TO, ANY POWER OUTAGES, SYSTEM FAILURES, NETWORK ATTACKS, SCHEDULED OR UNSCHEDULED MAINTENANCE, OR OTHER INTERRUPTIONS.
**YOU** are responsible for keeping enough backups of your data**.**
**Recommended** reading: [https://www.backblaze.com/blog/the-3-2-1-backup-strategy/](https://www.backblaze.com/blog/the-3-2-1-backup-strategy/)
With that out of the way, let's begin! ### Instructions First, open Windows Explorer, and navigate to **This PC**: [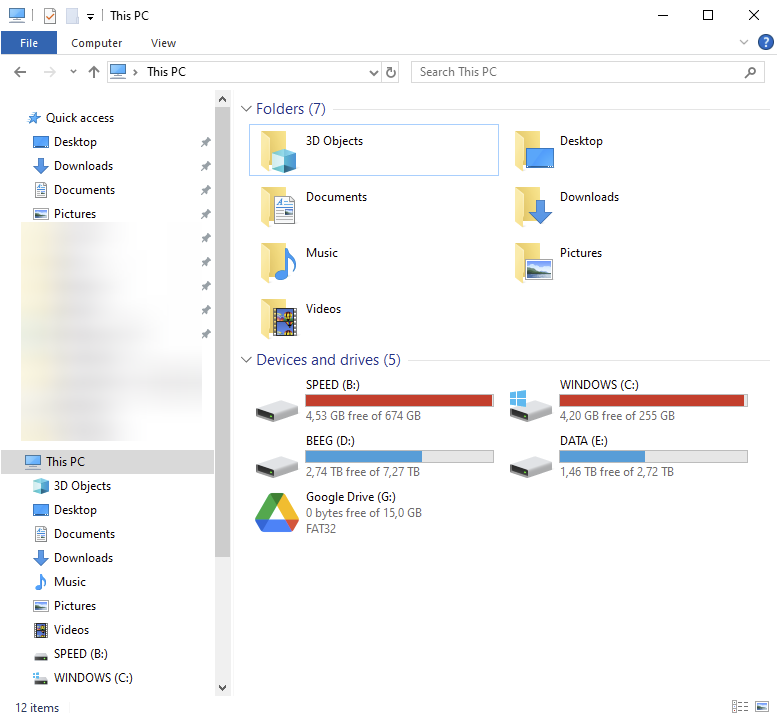](https://wiki.joris.me/uploads/images/gallery/2024-06/g8C88HsLKom65q6Q-image.png) Then, navigate to the **Computer** tab and click the **Map network drive** button: [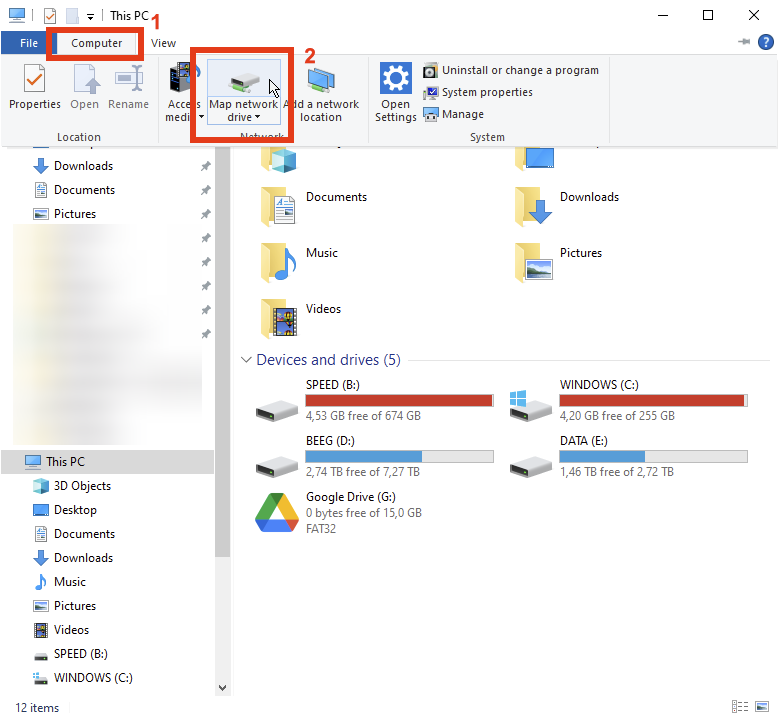](https://wiki.joris.me/uploads/images/gallery/2024-06/TA0gTKuRen5sWS8O-image.png) You should be greeted by a window that looks something like this: [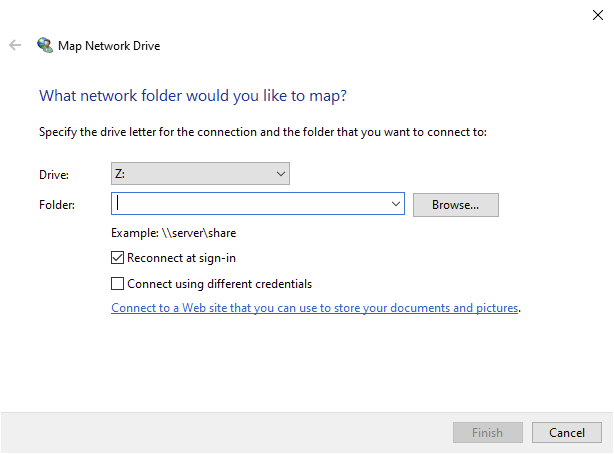](https://wiki.joris.me/uploads/images/gallery/2024-06/U5VIDxu8QX1GCN0E-image.png) If you want, choose a drive letter of your choice: [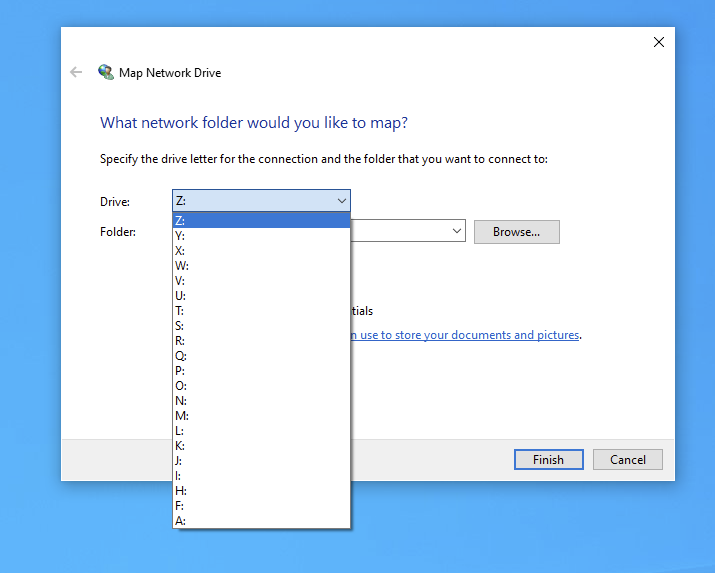](https://wiki.joris.me/uploads/images/gallery/2024-06/Mn0l8CVIvIrT4QoH-image.png) Then, for **Folder**, enter the following: ``` \\smb.ts.joris.me\yourShareNameHere\ ``` **For example**, my share is called `joris`, so for me it looks like this: ``` \\smb.ts.joris.me\joris\ ``` [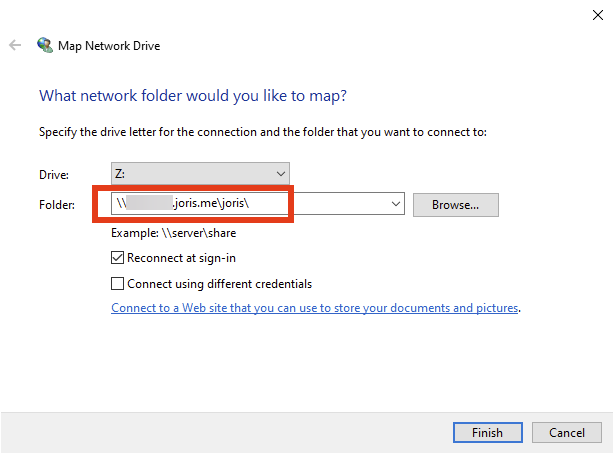](https://wiki.joris.me/uploads/images/gallery/2024-06/HuaMPDuBTasYuKpu-image.png) Then, **check the box** that says "Connect using different credentials". [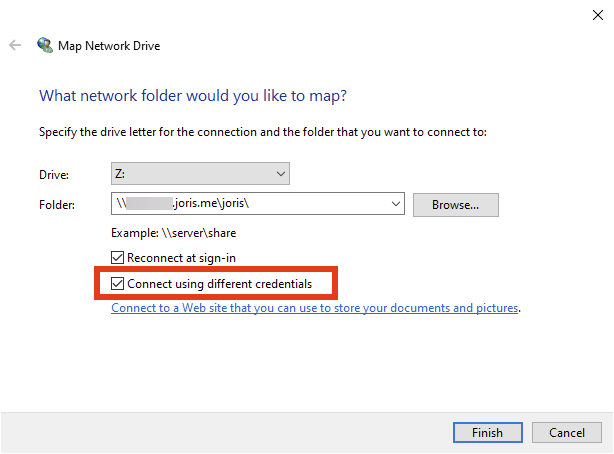](https://wiki.joris.me/uploads/images/gallery/2024-06/sMEDJbUnzs9V8ut0-image.png) Next, click **Finish**. [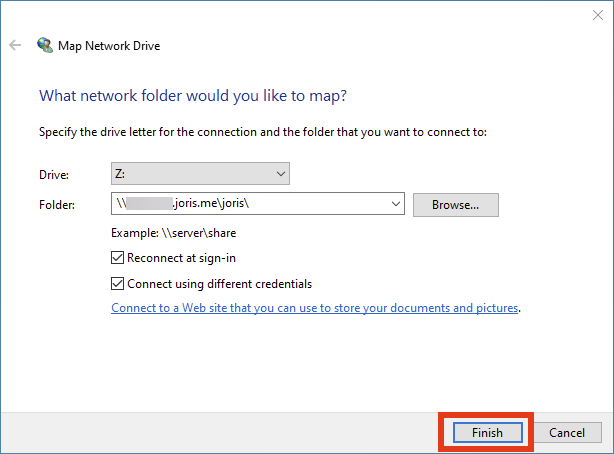](https://wiki.joris.me/uploads/images/gallery/2024-06/GWiM06tJOScObCYn-image.png) You will see a window that looks like this: [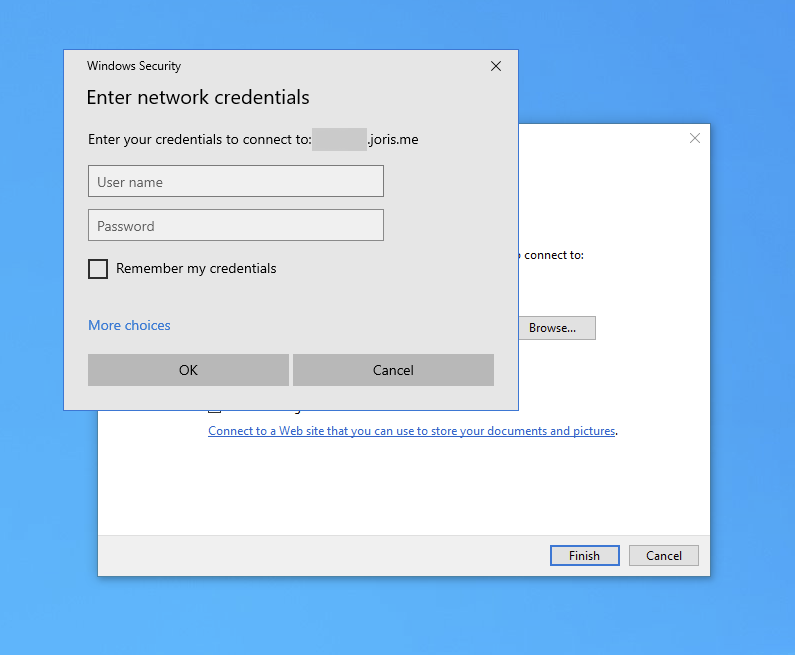](https://wiki.joris.me/uploads/images/gallery/2024-06/1fcUi5JwCNYWLYEm-image.png) Enter the credentials I provided you, and check "Remember my credentials": [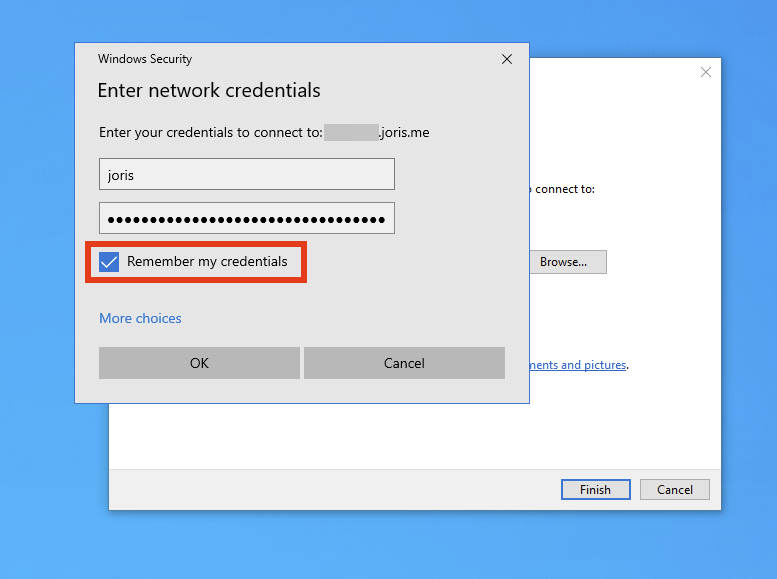](https://wiki.joris.me/uploads/images/gallery/2024-06/36dYWpmAInyXqLqM-image.png) Then click **OK:** [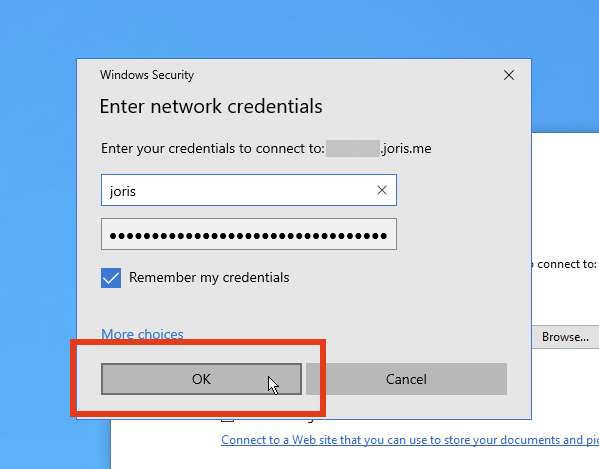](https://wiki.joris.me/uploads/images/gallery/2024-06/jVf4LVfqc8hyvThO-image.png) **And you're done!** You will probably be greeted by the drive: [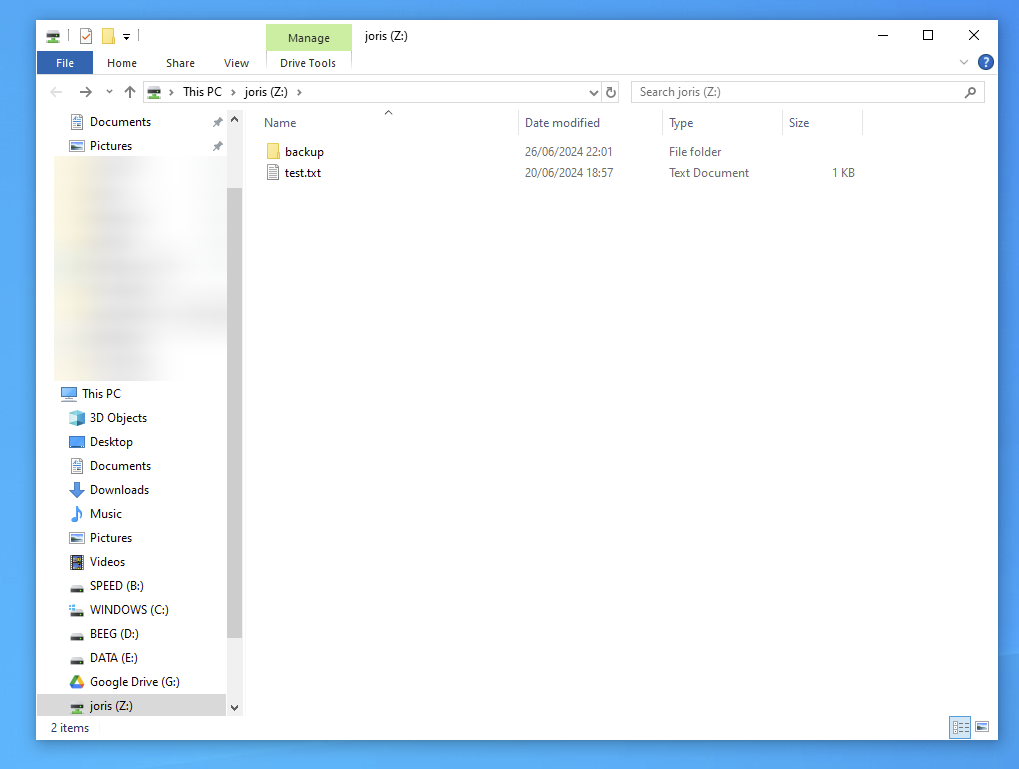](https://wiki.joris.me/uploads/images/gallery/2024-06/HvxifLsiYEE1hA8S-image.png) In your case, there won't be any existing files. # Mount a network drive (Linux NFS) ### Introduction This is a short manual on mounting network storage on Linux using NFS.This guide assumed that you have established a connection to my network; see [Connecting to my network](https://wiki.joris.me/books/network-storage/chapter/connecting-to-my-network) if you haven't already.
### Before we begin..I SHALL NOT BE LIABLE FOR ANY DAMAGES OR LOSSES ARISING FROM ANY USE OF THE NETWORK SHARE, INCLUDING ANY INTERRUPTIONS TO THE NETWORK SHARE, INCLUDING, BUT NOT LIMITED TO, ANY POWER OUTAGES, SYSTEM FAILURES, NETWORK ATTACKS, SCHEDULED OR UNSCHEDULED MAINTENANCE, OR OTHER INTERRUPTIONS.
**YOU** are responsible for keeping enough backups of your data**.**
**Recommended** reading: [https://www.backblaze.com/blog/the-3-2-1-backup-strategy/](https://www.backblaze.com/blog/the-3-2-1-backup-strategy/)
With that out of the way, let's begin! ### Installing dependencies We need NFS client tools to mount a drive. #### On Debian ``` sudo apt install nfs-common ``` #### On Arch Linux ``` sudo pacman -S nfs-utils ``` ### Mount a volume I have a separate domain used for resolving machines and services on my homelab. Take the following script and fill it out with your parameters. ```bash #!/bin/bash POOL=alpha # Leave as-is unless told otherwise. SHARE=joris # <-- Put your name here, in lower case. MOUNT=/mnt # <-- Write where you want to mount it. sudo mount truenas.storage.jorislab.nl:/mnt/$POOL/$SHARE $MOUNT ```And we're done! Enjoy!